Building a simple server for a teenager
One of my friend's her son is getting into pc building and modifying minecraft and asked me if I could help him out with hosting a server and that is something you do not have to ask me twice. 😃
I had a few prerequisites that the system had to adhere to: It had to be a compact and power efficient with enough RAM and CPU power to host a few instances, free and preferably open source software, and it had to be easy to manage for him.
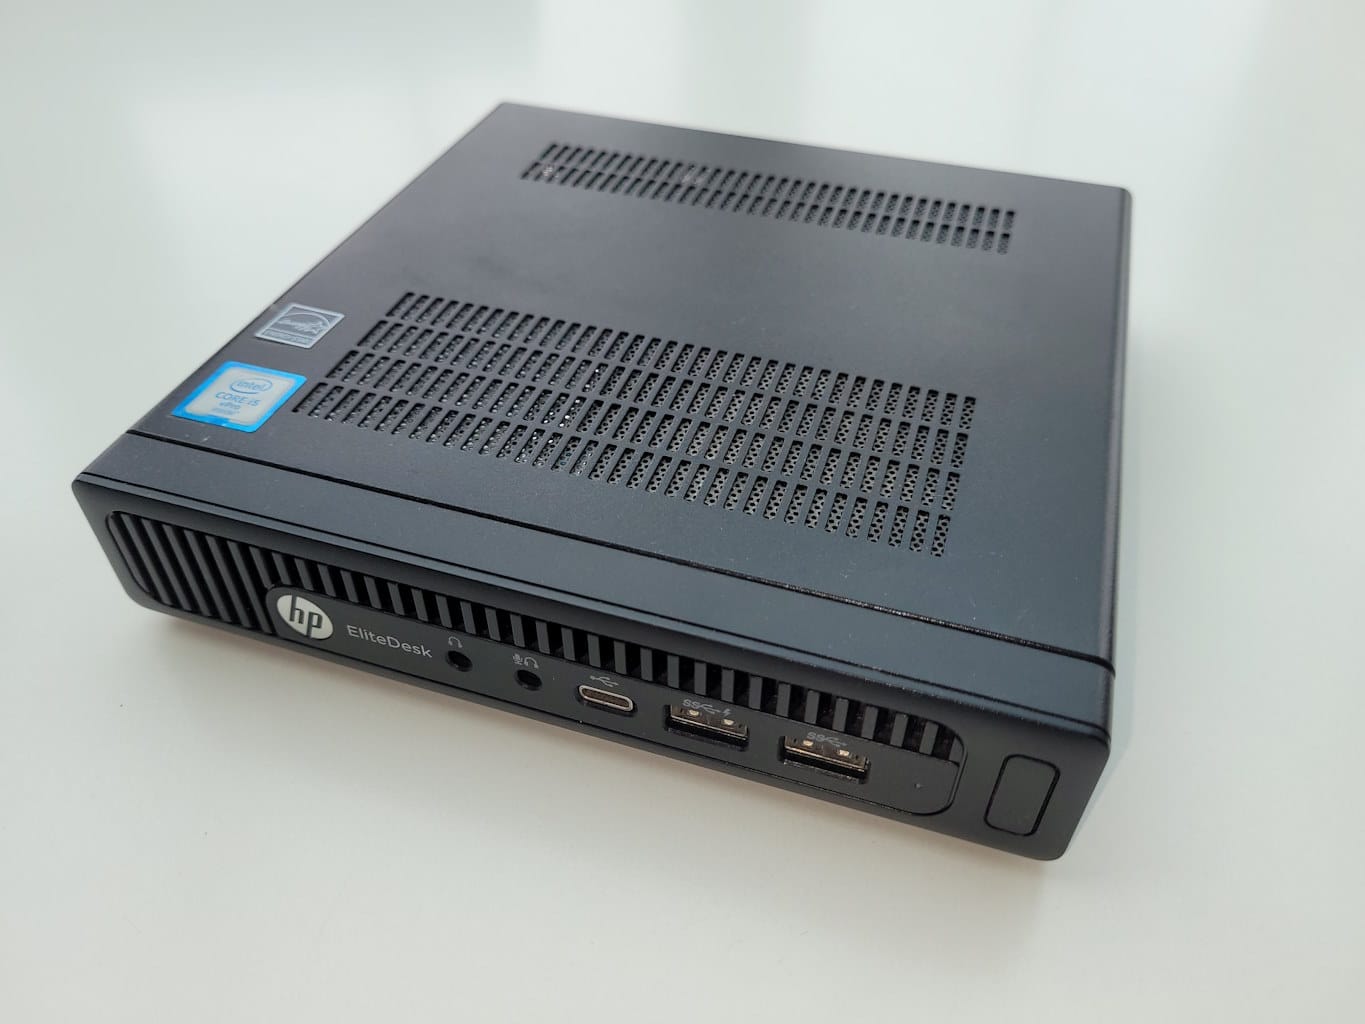
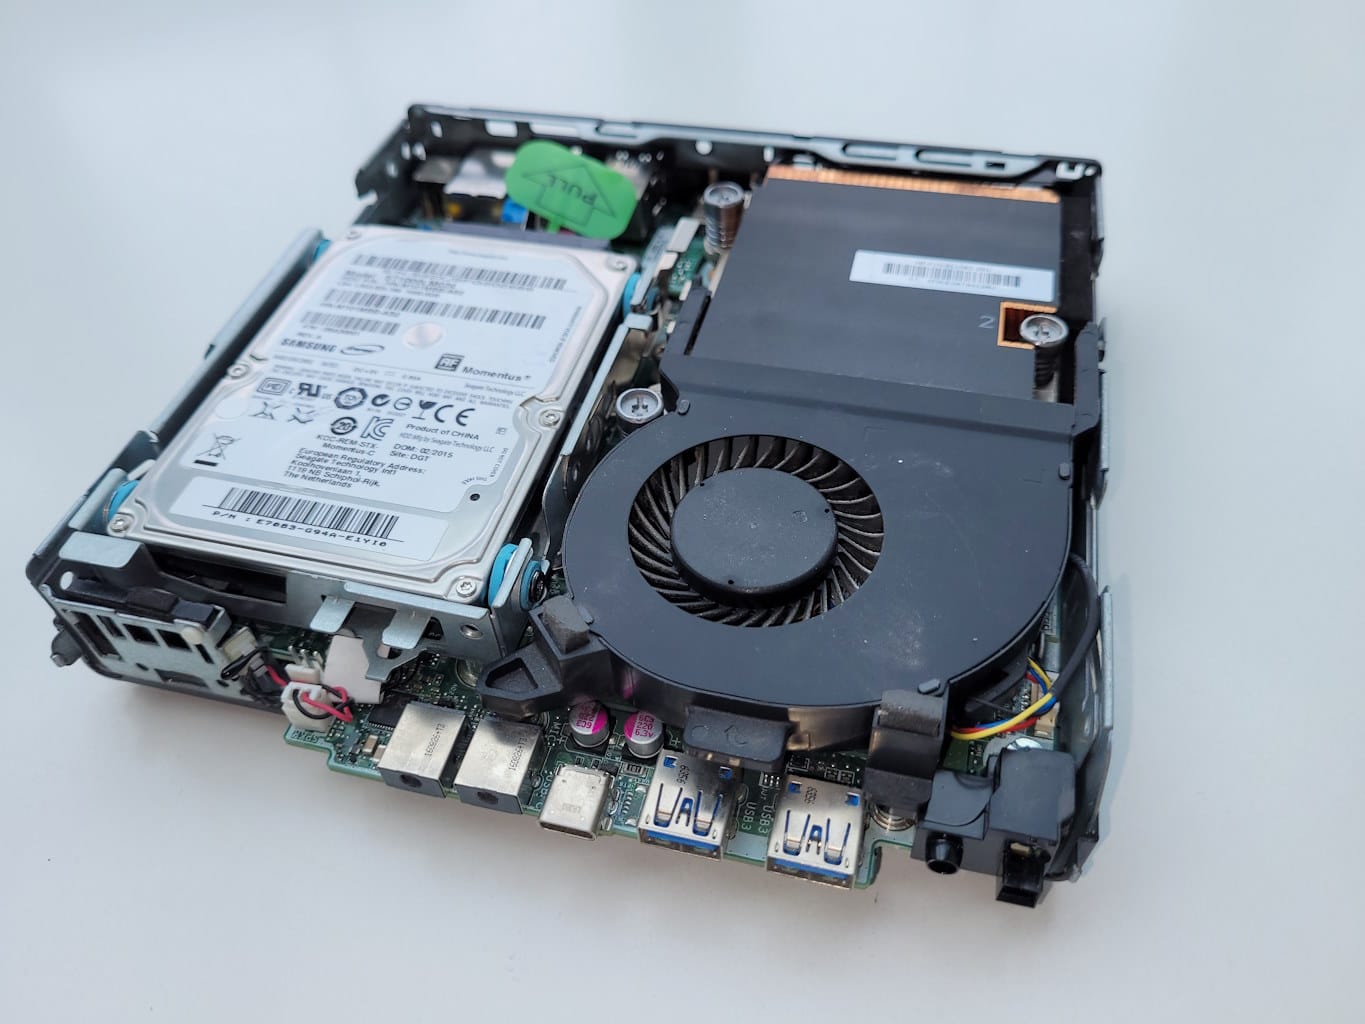
An old HP EliteDesk 800 G2 mini was perfect and it was not in use anymore. I was thinking of using it as a Proxmox node in my cluster, but with only 16 gigs of memory it was not perfect so it did not get used for that.
Other specs are: it has a low power Intel Core-i5 6500T with 4 cores, a 250GB NVMe SSD and a 1 TB laptop hard disk, 6 USB-A 3 ports and one USB-C port, two display-ports, a VGA port and gigabit ethernet.
I decided to install Debian 12 on the SSD as the base OS, it is a clean and easy to use OS and with plenty of info online, so he will be able to find guides for the most common tasks. To avoid having to do everything manualy using the CLI I have installed CasaOS on top of Debian. This will provide him the easy to use web interface to install and maintain a good selected of software using Docker instances, manages files and shares easily and keep an overview of the used resources.

The laptop drive will be used to store files like movies and as a target for backups for the applications running on CasaOS. I have installed Crafty so he has an easy way to host Minecraft servers and Jellyfin to play movies and TV shows. There were already some media folders on the SSD, but I also made these folders on the hard disk and changed the docker config for those apps so Crafty can make backups to the drive and Jellyfin can access the media folder.
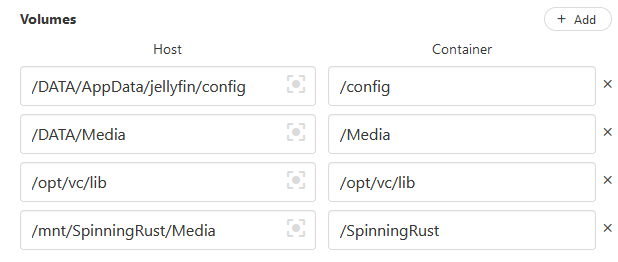
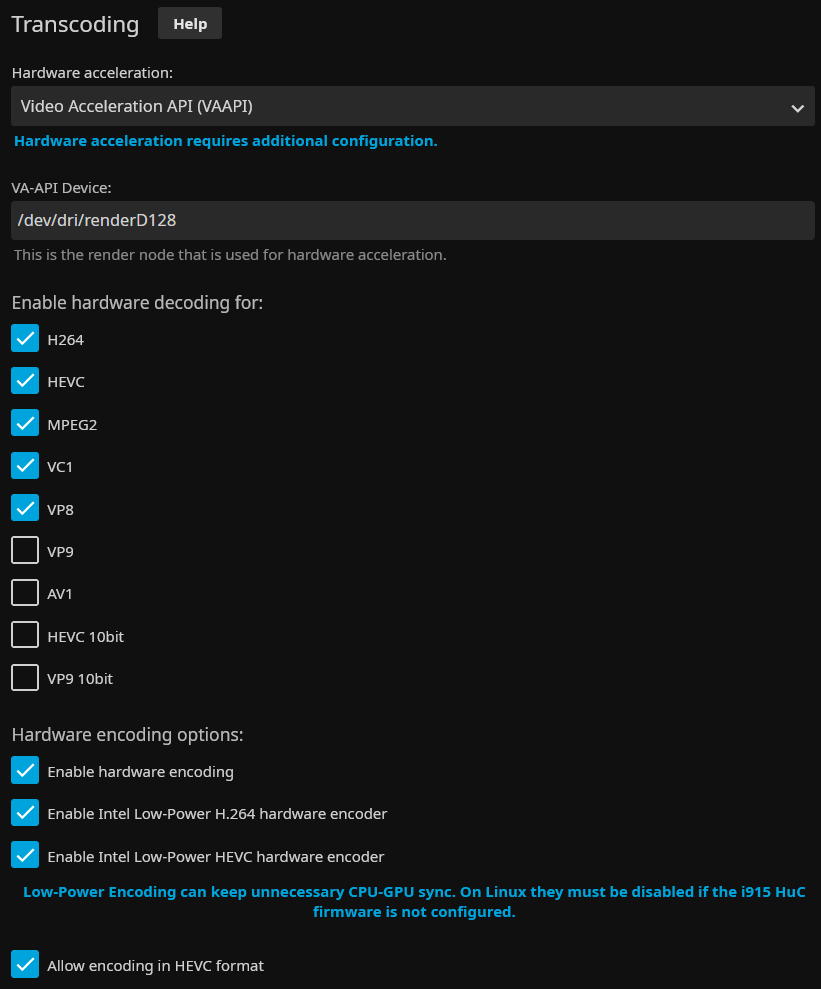
Sometimes you also have to add some devices to the Docker instance. Jellyfin for example can use the media extensions of the CPU for transcoding the media files. I could see that on the Debian host /dev/dri/renderD128 was available so I passed that through to the Jellyfin docker.
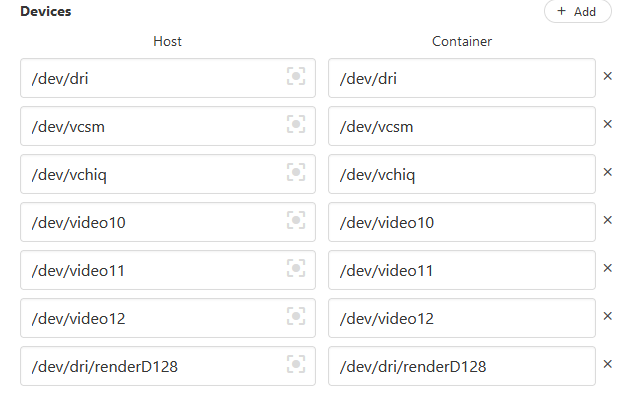
I could remove the other devices but I decided to leave them in. To use the hardware decoding and encoding you have to enable that in the playback options of Jellyfin also. After looking up what a 6th generation intel CPU was supporting I enabled the corresponding features in Jellyfin.
I think that will provide him a good start and I am sure he will have a lot of use for this little server. Other things I did was making him a sudo account in Debian and I used the same login and password for the applications I have installed. When possible I have also added my own account, just in case anything goes wrong.
Another thing I can recommend doing is installing a service like Tailscale, a free to use VPN service that makes it very easy to remotely connect to it without needing to setup anything like a fixed IP or port forwarding. It also makes it easy to add mounts to remote system on the same tailscale network, so in the feature I might give him access to some of my other systems.
I am running my own dynamic DNS service and I have added a script to update his domain name with his public IP so the Minecraft servers will be easy to find by his friends and it will look very professional with a real domain name 😄
After installing the server I reserved an IP on his modem and forwarded the ports for Minecraft. Over Tailscale I can access the webUI of his modem remotely if I need to do some more port forwarding, but I am sure he will be able to do that by himself soon.